Procedure Documentation Section

Providers can use this section to document clinical details related to the procedures performed and billed for in the office. As an alternative, you can document in-office procedures using the sections included in the Structured Procedure Documentation feature.
During the encounter workflow, MAs access this section from the Intake checklist.
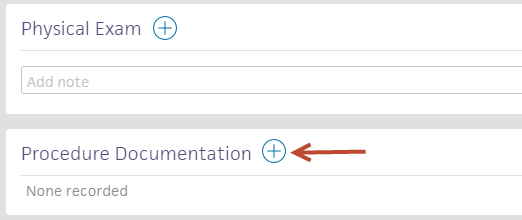
In the Exam stage of an encounter, click the PE step indicator and click the plus icon ![]() under the Procedure Documentation heading.
under the Procedure Documentation heading.
- In the Exam stage of an encounter, click the PE step indicator and click the plus icon
 under the Procedure Documentation heading.
 - Click the plus icon
 and select a procedure template.
 - Complete the template and click the Next button.
If the template has been mapped to a procedure code, the code is pre-populated on the Billing tab in the Sign-off stage and on the Claim: Billing tab in the Checkout stage.
During the Exam stage of the encounter, you can select local procedure templates. The rendering provider's most frequently used templates are at the top of the list. athenaOne filters the templates by the specialty of the rendering provider as well as the patient's age and gender.

You can create or add local procedure templates using the Procedure Templates page.
You can create local procedure code mappings for accelerated billing using the Order Type & Procedure Template Mapping page.
You can use the jotter tool to create free-hand images to help document a patient's condition. The jotter tool is available in the following encounter sections:
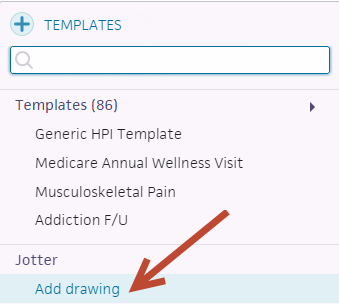
- In any of the encounter sections mentioned above (HPI, ROS, PE, or Procedure Documentation), click the plus icon
 .
. - At the bottom of the menu, select "Add drawing" under the Jotter heading.

- In the Jotter tool, select the desired anatomical drawings or use the default blank jotter.
- Use the pen to create a free-hand drawing. You can also use the text, color, line weight, erase, and clear options as needed.
- Click the Save button (in the top right corner) to save your progress, and click outside the Jotter window to return to your encounter workflow.
Thumbnails of your newly marked drawings will now appear at the bottom of the encounter section.
You can click on these thumbnails to make edits or add new drawings.
Note: Any unmarked drawings will not be saved.
The Procedure Time Report allows you to examine the duration of structured procedure encounters and patient turnaround times.
Practice Managers can run the Procedure Time Report to:
-
Assess the efficiency of structured procedure encounters
-
Examine how long structured procedure encounters take and what patient turnaround time is
-
Identify changes, if necessary, to improve efficiency
When you reuse content from a previous encounter in the Procedure Documentation section by clicking the reuse icon ![]() on the Visits tab, athenaOne adds the previous encounter's templates to existing documentation instead of replacing it.
on the Visits tab, athenaOne adds the previous encounter's templates to existing documentation instead of replacing it.
If you try to reuse a template that already exists in the current encounter, athenaOne keeps any existing content. For example, if you have already documented a Cerumen Removal template and later reuse a previous Procedure Documentation section that also has a Cerumen Removal template, athenaOne keeps the first one to avoid overwriting content you documented specifically for the current encounter. If you decide that you do want to use the previous encounter's documentation instead, you can delete the existing template and click the reuse icon ![]() for the section again.
for the section again.
In all other cases, clicking the reuse icon ![]() adds the previous encounter's templates to the section alongside existing content. For example, if you have already documented a Cerumen Removal template and later reuse a previous Procedure Documentation section that has a Colonoscopy template, athenaOne adds the Colonoscopy template to the section in addition to the Cerumen Removal template.
adds the previous encounter's templates to the section alongside existing content. For example, if you have already documented a Cerumen Removal template and later reuse a previous Procedure Documentation section that has a Colonoscopy template, athenaOne adds the Colonoscopy template to the section in addition to the Cerumen Removal template.